
How to Inflate a Presta Valve Without Leaks or a Bent Stem
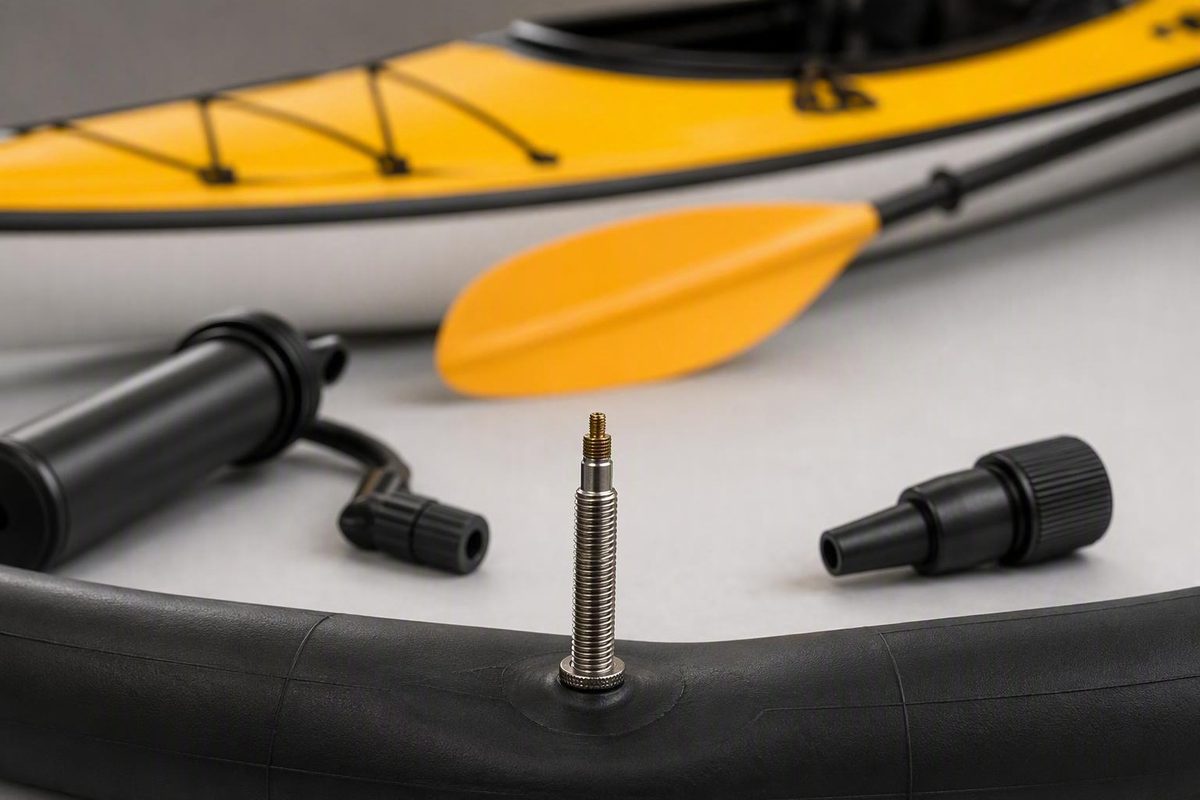
A Presta valve can seem fiddly if you are used to the wider Schrader valve found on car tires. The process is straightforward once you know the sequence: loosen the small nut at the tip, confirm that the valve can move, attach the correct pump head in a straight line, inflate while monitoring pressure, and remove the head without pulling sideways.
When air will not enter the tire, the problem may be a closed or sticky valve, an incorrectly configured pump head, a poor seal, or too little exposed stem for the pump chuck. Do not respond by forcing the pump or using the valve as a lever.
This guide synthesizes the cited cycling-maintenance sources and manufacturer guidance. It does not claim first-hand product testing or specialist mechanic review.
The one-minute Presta inflation checklist
Use this sequence with a compatible floor pump or hand pump:
- Remove the plastic dust cap.
- Loosen the small nut at the valve tip. Turn it counterclockwise until it stops. Loosen it fully, but do not try to remove it.
- Briefly press the loosened tip. If the tire contains air, you should hear a short release. This confirms that air can move through the valve and may free a sticky valve.
- Select the Presta-compatible pump connection. On a two-hole head, this is normally the smaller opening.
- Attach the pump head straight. Push it far enough onto the valve to form a seal without rocking it from side to side.
- Secure the connection. Move the locking lever, hold the press-on chuck, or thread on the fitting as required by your pump.
- Inflate with smooth strokes. Watch the gauge and remain within the applicable limits for the tire, rim or wheel, and bicycle.
- Release the pump head. Unlock, unclamp, or unscrew it according to its design.
- Remove the head in a straight line. Avoid twisting or pulling sideways.
- Close the valve. Turn the small tip nut clockwise until it is finger-tight, then replace the dust cap.
The small nut at the tip only needs to be loosened for inflation. It should remain attached to the valve. Once it is open, pump pressure normally opens the valve during each stroke, so you generally do not need to hold the tip down while pumping. This basic opening, attachment, and removal sequence is also shown in the BikeExchange Presta inflation guide.
Pump-head locking mechanisms differ. One pump may lock with its lever raised, while another may lock with the lever lowered or rotated. Do not copy the lever position from an unrelated pump. Follow the labels or instructions for the model in your hands.
Memory aid: Open, tap, attach, secure, pump, remove, close.
Identify the valve and the parts you should touch
A Presta valve has a slender metal stem with a small threaded or knurled nut at its tip. A Schrader valve—the style commonly used on car tires—is wider and has a recessed central pin. If the bicycle valve is narrow and requires you to loosen a tiny nut before adding or releasing air, it is probably a Presta valve.
These are the parts a labeled valve diagram should show:
        Plastic dust cap
               │
      Small valve-tip nut  ← loosen this to add or release air
               │
       Possible valve core ← removable on some valves, not all
               │
          Valve stem
               │
    Optional retaining nut ← sits beside the rim; does not open the valve
          ─── Rim ───
- Plastic dust cap: Covers the valve tip when no pump is attached.
- Small valve-tip nut: Loosens to permit inflation or deflation and tightens to close the valve afterward.
- Valve stem: The narrow metal tube extending through the rim.
- Valve core: The valve mechanism. Some Presta valves have a removable core, but others do not.
- Rim-side retaining nut: An optional larger nut beside the rim that can help hold the stem in position.
The small nut at the very top is the one to loosen before pumping. The separate retaining nut beside the rim does not open the valve. Turning only the retaining nut can leave the valve tip closed even though a nut on the stem has been loosened.
Do not remove the retaining nut merely to inflate the tire. If fitted, it may help keep the stem from retreating into the rim when the tire is completely flat. It should not be forced tightly against the rim; treatment of this nut depends on the valve, tube, and wheel design.
Some removable-core valves have wrench flats below the tip, but appearance varies. Unless the valve or wheel documentation confirms that the core is removable, do not assume that it is. A threaded pump fitting can sometimes start turning a removable core as the fitting is unscrewed, so watch the valve during removal. The distinctions among Presta, Schrader, removable-core, and pump-fitting designs are outlined in this Bicycling guide to bicycle valves.
The slender tip and stem can bend if a pump is attached or removed at an angle. Keep the head centered. If it feels jammed, release its locking mechanism before pulling harder; do not use the stem as a lever.
Choose and configure the right pump head
A pump can support Presta valves in several ways. Inspect the head and read its instructions before pushing it onto the valve.
Compatible arrangements include:
- A dedicated Presta head
- The smaller opening on a two-hole or dual head
- A single automatic head specifically rated for both Presta and Schrader
- A reversible or internally configurable head
- A Schrader-only head used with a Presta-to-Schrader adapter
A working pressure gauge is preferable because it allows controlled inflation rather than relying only on how the tire feels. The pump must also be capable of reaching the pressure appropriate for the particular tire-and-wheel system.
Dual-head pump: Use the narrower opening. The larger opening is normally for Schrader valves. If the openings are labeled, follow those labels rather than relying solely on appearance. The BBB Cycling pump guide likewise identifies the narrow opening as the Presta connection.
Automatic pump head: Confirm that the pump is explicitly rated for Presta valves. A head with only one opening is not necessarily automatic. Attach and lock it according to the pump manufacturer’s instructions.
Reversible or configurable head: In one common arrangement, the gasket’s narrower Presta side faces outward. This is not universal: the number, order, and orientation of the internal pieces depend on the pump. Consult its manual before opening the head.
Lever-lock head: Put the head onto the valve while its clamping mechanism is released, then move the lever into the pump’s marked locked position. There is no universal “lever up” or “lever down” rule.
Screw-on head: Align the fitting carefully and turn it until it seals. Avoid cross-threading or forcing it excessively tight. When finished, unscrew it deliberately and watch for movement of a removable valve core.
Press-on head: Push it straight onto the valve and keep it stable for as long as the design requires. Do not hold it at an angle to stop a leak. An angled fitting loads the stem sideways and normally indicates that the head should be removed and reseated.
Pump compatibility decision
- Direct Presta support: Use the pump’s Presta-specific connection.
- Convertible support: Configure the automatic or reversible head according to the pump manual.
- Schrader-only support: Open the Presta valve and install a Presta-to-Schrader adapter before connecting the pump.
If you cannot identify which arrangement applies, find the pump model and check its instructions before forcing the head onto the valve.
Attach, inflate, and remove the pump without damaging the valve
Rotate the wheel to a position where the pump hose or body can reach without pulling on the stem. No particular clock position is required. Choose the position that lets you hold the pump head squarely and operate the pump comfortably.
Remove the dust cap and turn the tip nut counterclockwise until it stops. Briefly press the tip. A short burst of air means that the valve can open. If the tire is completely flat, little or no air may escape, but gently pressing the tip can still help free a sticky valve.
Line up the pump head with the stem. Push it straight on and far enough to engage the valve and form a seal. A head that barely catches the end of the stem may wobble, leak, or pressurize only the pump hose instead of sending air into the tire.
Secure the connection according to its design:
- Move a lever into the marked locking position.
- Hold a press-on fitting squarely.
- Thread a screw-on hose fitting onto the valve without cross-threading it.
If air escapes continuously around the attached head, stop. Release the lock, remove the head, verify that you selected or configured the Presta connection, and attach it again. Tilting a leaking head is not a dependable solution.
Once the seal is secure, inflate with smooth, complete strokes while watching the gauge. The loosened Presta valve should open in response to pump pressure. You generally do not need to press or hold the tip during each stroke.
If the pump becomes unusually stiff while the tire remains flat, stop rather than forcing it. Air may be trapped in the pump because the valve is still closed or sticky, the head is on the wrong setting, or the chuck is not seated deeply enough. Continuing to push harder does not correct the connection and can put unnecessary force on the pump and valve; a short-stem example showing these symptoms appears in this deep-rim troubleshooting discussion.
With a direct-attachment mini pump, support the end nearest the valve. Brace your hand against the tire, rim, or another stable part of the wheel so that the pumping motion is absorbed by your supporting hand rather than transmitted sideways through the stem. The exact grip depends on the wheel and pump, but the principle is to isolate the valve from the back-and-forth motion, as illustrated in this mini-pump bracing guide.
A pump with a flexible hose can reduce the sideways movement transferred from the pump body to the valve. It does not eliminate the need to connect and remove the fitting carefully, especially if the hose has a threaded chuck.
When the gauge reaches the selected pressure:
- Stop pumping.
- Release the lever, unclamp the head, or unscrew the hose fitting.
- Stabilize the wheel and valve area.
- Pull the pump head straight away from the stem.
- Turn the valve-tip nut clockwise until finger-tight.
- Replace the dust cap.
A short hiss as the pump comes off often comes from compressed air in the pump head or hose rather than significant air loss from the tire. Continued hissing from the valve, a visibly softening tire, or a lower reading when a gauge is reconnected correctly requires inspection for a valve, tube, tire, or tubeless-system leak.
Set pressure without treating the sidewall maximum as a target
Before inflating, check the available pressure instructions and limits for the:
- Tire
- Rim or wheel
- Bicycle
- Tubeless system, if applicable
Use a gauge and remain within every applicable limit. A tire’s permitted pressure does not override a lower wheel or bicycle limit.
A maximum printed on a tire sidewall is a limit, not automatically the best everyday riding pressure. BBB Cycling similarly distinguishes a listed maximum from an ideal riding setting in its bicycle inflation guidance linked above.
For that reason, a single pressure recommendation for every road, hybrid, gravel, mountain, or electric bicycle would be misleading. Two bicycles in the same category may have different tires, rims, loads, constructions, or approved pressure ranges.
Underinflation and overinflation can both create problems, but the correct pressure cannot be diagnosed from bicycle category alone. Do not compensate for an unreadable label by guessing. Look for documentation associated with the exact tire, wheel, and bicycle.
If several instructions or limits are available:
- Confirm that the tire and rim are compatible.
- Identify the lowest applicable maximum.
- Use the manufacturer’s starting-pressure guidance if available.
- Account for the stated load and use conditions.
- Check the result with a reliable gauge rather than relying only on squeezing the tire.
If you cannot determine a suitable operating pressure, contact the tire, wheel, or bicycle manufacturer or ask a qualified bicycle mechanic. Provide the exact tire, rim or wheel, and bicycle model information so the advice can address the complete system.
Use a Presta adapter when the pump fits only Schrader valves
A Schrader-only pump does not fit a bare Presta valve directly. A Presta-to-Schrader adapter changes the external fitting so that the wider pump chuck can connect.
Use the adapter in this order:
- Remove the Presta valve’s dust cap.
- Loosen the small tip nut counterclockwise until it stops.
- Briefly press the tip to confirm movement and help free a sticky valve.
- Thread the adapter onto the opened valve.
- Attach the Schrader pump head to the adapter.
- Secure the pump head according to its design.
- Inflate cautiously while watching the gauge.
- Release and remove the pump head.
- Hold the adapter steady while unscrewing it from the valve.
- Close the Presta tip nut finger-tight and replace the dust cap.
Bracing the adapter during disconnection helps prevent a stubborn pump head from twisting the slender valve. Grip the adapter rather than using the valve stem to resist the pump fitting.
An adapter changes fitting compatibility; it does not make every compressor appropriate for a bicycle tire. If such equipment is used at all, it should provide controllable delivery and a reliable gauge. Add air in very short bursts, check the pressure repeatedly, and remain within all applicable equipment limits, as advised in this adapter and compressor guide.
Do not assume that a car inflator, electric compressor, or gas-station pump is suitable merely because its chuck connects to the adapter. Its airflow control, pressure range, gauge accuracy, and operating instructions still matter.
An adapter is a useful compatibility or emergency option. It is not necessary when a floor pump or mini pump already supports Presta valves directly.
Troubleshoot no airflow, leaks, a zero gauge, and deep rims
A tire that does not inflate on the first attempt does not automatically have a defective valve. Match the symptom to the possible connection, configuration, valve, or tire-system issue.
| Symptom | What it may indicate | What to do |
|---|---|---|
| Pump becomes stiff, but the tire stays flat | Closed or sticky tip, incorrect pump-head configuration, or incomplete seating | Stop pumping. Open the tip nut fully, press the tip briefly, verify the Presta setting, and reseat the head straight and deeply. |
| Air leaks continuously around the pump head | Poor seal, wrong opening, reversed insert, or insufficient engagement | Unlock and remove the head. Confirm the correct opening or insert orientation, align it straight, push it farther on, and secure it again. |
| Gauge remains at zero | Air is not reaching the tire, the seal is poor, the head is configured incorrectly, or too little stem is exposed | Check the valve opening, pump setup, connection depth, and exposed stem before concluding that the gauge or valve is defective. |
| Valve stem is too short for a deep rim | The pump chuck cannot engage enough of the valve | Use a suitably longer valve, a compatible extender, or a chuck that requires less exposed stem. |
| Pressure drops after inflation | Poor gauge connection, loose removable core, damaged valve, punctured tube, tire leak, or tubeless-system leak | Recheck pressure with a sound connection, inspect the valve, and service the relevant component. |
| Screw-on head appears to turn the valve core during removal | A removable core may be loosening | Stop, stabilize the valve, remove the chuck carefully, and inspect the core according to the valve manufacturer’s instructions. |
| A completely flat valve retreats into the rim | No tire pressure is holding the stem outward | Support the stem from the tire side while carefully seating the pump head. |
| Tire inflates but will not retain pressure | A fault exists beyond ordinary pump attachment | Inspect for visible valve damage and leaks; repair or replace the affected tube, valve, tire, or tubeless component as appropriate. |
If the pump becomes stiff: Do not push harder. Release the head and begin again. Confirm that the tiny nut at the top—not merely the retaining nut beside the rim—is open. Press the tip, select the Presta connection, and ensure that the chuck has enough stem to seal.
If air leaks around the head: Remove and reseat it rather than tilting it. Check whether a reversible insert is configured incorrectly or whether you selected the larger Schrader opening. If the correct setup and deeper engagement do not restore the seal, consult the pump instructions or service the pump head.
If the gauge stays at zero: A zero reading does not prove that the stem is too short. It can also result from a closed valve, poor seal, incorrect head configuration, or inadequate insertion. Check those possibilities systematically.
If the stem is short: Deep-section rims can surround much of the valve, leaving too little stem for some pump chucks. Possible remedies include a longer tube valve or tubeless valve, an extender compatible with that valve design, or a lower-profile pump chuck. There is no universal minimum exposed length because pump heads engage differently.
If pressure falls after pumping: First distinguish a brief connection hiss from continuing pressure loss. Reconnect the gauge carefully. If pressure continues to fall, possible causes include a loose removable core, damaged valve, punctured tube, tire leak, valve-to-tube failure, or tubeless-system leak. Persistent leakage or visible damage requires inspection rather than repeated inflation.
If you use a screw-on head: Unscrew it in a controlled manner. If the valve has a removable core, watch whether the core turns with the pump fitting. Do not apply a generic tightening torque; follow the valve manufacturer’s specification or ask a qualified mechanic to inspect it.
If the tire is completely flat: The stem may slide inward when you push the pump onto it. Without removing the tire, place your fingers on the collapsed tire casing directly around the valve area and gently press the casing and tube toward the rim so the valve base is supported and the stem projects outward. Hold that support only long enough to seat the pump head straight. Avoid pinching the tube or forcing a stem that is misaligned. If the stem cannot be held outward safely, remove the wheel and have the tube or tubeless valve inspected rather than prying at it.
If the tire is tubeless:
Persistent leakage, visible valve damage, or a tire that will not retain pressure calls for inspection and appropriate tube, valve, tire, or tubeless-system service.
Frequently asked questions
Do I need to hold the Presta valve tip down while pumping?
No. Loosen the tip nut and briefly press it before attaching the pump, but do not hold it down during inflation. Once pump pressure exceeds the pressure in the tire, the loosened valve normally opens and admits air.
If air does not enter, stop and check whether the valve is sticky, the head is configured for Presta, and the connection is fully seated. Do not try to keep the tip depressed by attaching the pump at an angle.
Which hole on a two-hole pump head is for a Presta valve?
Use the smaller, narrower opening. The larger opening is normally for a Schrader valve.
Check any labels on the head because the arrangement can be confusing when the openings are side by side. Attach the smaller opening straight to the loosened Presta valve and operate the lock according to that pump’s markings.
Why does air hiss when I remove the pump?
A brief hiss usually comes from compressed air trapped in the pump head or hose. It does not necessarily mean that the tire has lost a meaningful amount of pressure.
If hissing continues after the pump is removed, close the tip nut and inspect the valve. Recheck the tire with a properly seated gauge. Continuing pressure loss can indicate a loose removable core, damaged valve, puncture, or another leak.
How do I let air out of a Presta valve?
Remove the dust cap and loosen the small nut at the valve tip counterclockwise until it stops. Press the tip downward to release air. Release it to stop the flow, check the pressure, and repeat as needed.
When finished, turn the tip nut clockwise until finger-tight and replace the dust cap. Do not remove the tip nut merely to deflate the tire.
Can I pump a Presta valve on a deep-section rim?
Yes, provided enough valve stem extends beyond the rim for your pump head to form a secure seal. The necessary exposure depends on the chuck, so there is no single valve length that works with every deep rim and pump combination.
If the head cannot engage securely, use a correctly sized longer valve, a compatible valve extender, or a chuck that needs less exposed stem. Do not hold a marginal connection sideways to stop it leaking; doing so can load or bend the valve.
The dependable sequence
For reliable inflation, open the tip, confirm airflow, attach the correct pump head straight, inflate within the equipment limits, release and remove the head straight, and close the valve finger-tight.
If the pump becomes stiff, leaks around the head, or shows zero, do not force it. Stop and check the valve opening, pump configuration, connection depth, exposed stem length, and possible leaks before trying again.