
Repair a Small Kayak Crack: Identify the Plastic Before Welding
Learn when a small plastic kayak crack is a DIY repair, how polyethylene welding works, and how to check the hull before paddling again.
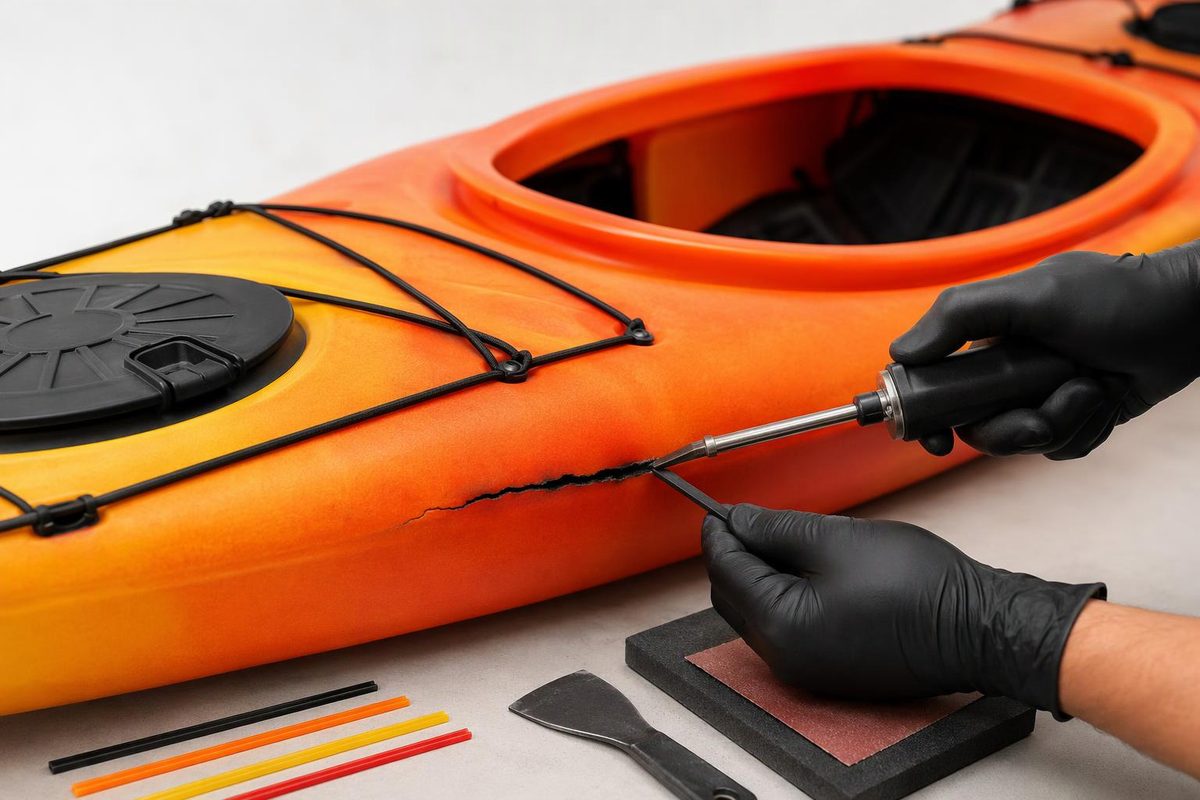
For a small crack in a weldable polyethylene kayak, plastic welding is a standard repair approach: clean and bevel the crack, then fuse compatible repair plastic into the hull. Melting a strip over the surface is not enough—the filler and original plastic must blend together. Kayak Distribution’s repair instructions describe this process for its polyethylene boats.
First confirm the hull material and whether the damage is suitable for a home repair. “Plastic kayak” is not a sufficient material specification.
Check the material and crack first
Look up the exact model and year, or send the manufacturer photographs with the serial number. Ask which repair method and filler it approves.
- Weldable polyethylene: The steps below apply when the manufacturer confirms welding is suitable.
- Crosslinked polyethylene: Do not use this general DIY procedure. It needs specialist advice because its behavior under heat differs from ordinary polyethylene. Paddling Magazine’s repair specialist warns that avoiding scorching is particularly difficult with crosslinked hulls.
- Thermoformed ABS or composite construction: Use that hull’s repair system, not polyethylene welding instructions. Kayak Distribution separates these repair methods.
Wash and dry the damaged area, then inspect it inside and outside where accessible. A shallow scratch is not the same as a split through the wall. Photograph the crack before removing material or applying heat, especially if warranty coverage may apply.
For a first DIY repair, limit the job to a short, isolated crack with accessible surfaces and sound surrounding plastic, and have the manufacturer confirm that it is suitable. Get professional assessment for cracks around scuppers, seat supports or mounts; branching cracks; distorted plastic; or a failed previous repair. Location matters as much as length. Skipjak’s assessment guide flags these areas and damage patterns for expert attention.
Gather the right tools
You will need:
- Manufacturer-approved polyethylene welding rod or repair strip.
- A plastic welding iron, or a heat gun with the focusing nozzle specified by the repair instructions.
- A scraper or knife, coarse sandpaper and a suitable beveling tool.
- Supports to hold the hull in its original shape.
- Eye protection and the protective equipment specified by the tool maker.
Choose filler by compatibility, not color. Do not assume any recycled plastic will work. Polyvance’s plastic-repair manual explains that fusion welding requires a compatible rod and base material.
Work in a well-ventilated space, away from flammable materials. Practice on compatible scrap before touching the boat. Avoid improvised open-flame heating.
Weld the crack
Follow the hull maker’s instructions over any general procedure, particularly for groove depth, reinforcement and access to the inside surface.
1. Clean, dry and support
Remove grit, grease and old repair residue. Use only a cleaner approved for the hull and repair system, and let the area dry fully. Align the crack edges and support the boat so heating will not pull the hull out of shape.
2. Bevel the damaged edges
Prepare a V-shaped groove along the crack as specified by the repair instructions. This exposes clean material and gives the filler somewhere to blend into the hull. Do not simply cut the crack wider through the entire wall. Polyvance’s airless-welding procedure uses a partial-depth groove and a subsequent weld from the opposite side.
3. Heat the hull and filler together
Use the setting appropriate to the approved filler and tool; there is no single heat-gun temperature that suits every hull and technique.
Work in short sections. With a heat gun, heat both the groove and repair strip until the surfaces become shiny and blend under gentle pressure. Stop if the hull starts sagging or the crack opens wider. These are overheating cautions in Kayak Distribution’s polyethylene instructions.
With a welding iron, thoroughly mix the softened filler with the base plastic rather than leaving a bead sitting on top. Polyvance recommends sections no longer than two inches in its airless-welding method. Complete the approved inside/outside sequence; do not assume an exterior cap repairs the full wall thickness. If you cannot reach a surface required by the instructions, get repair help rather than skipping it.
4. Cool before finishing
Keep the hull supported while the weld cools naturally. Do not quench it with water. Then remove sharp excess without thinning the repaired wall. Paddling Magazine’s repair guidance recommends natural cooling and retaining a weld at least as thick as the original surface.
Can you use epoxy instead?
Do not substitute household glue, silicone or generic epoxy without material-specific approval. However, “epoxy never works on polyethylene” is too broad: WEST SYSTEM lists G/flex 655 for polyethylene and ABS canoe/kayak repairs. That is a separate repair system requiring its own preparation and curing instructions—not a shortcut added to this welding procedure.
Check it before returning to the water
Once fully cooled or cured, inspect both sides for gaps, unbonded edges and distortion. Follow any testing instructions supplied with the approved repair method. For an initial leak check, start with a dry interior and float the empty boat in very shallow, sheltered water where you can retain control of it and inspect the repaired area. Skipjak recommends a controlled leak test before returning to paddling.
A leak-free check does not establish structural strength. If the weld separates, the crack grows or the area remains distorted, stop and seek assessment.
Make the first paddle short, on sheltered water close to an easy landing, wearing a life jacket and with someone nearby. Recheck the repair afterward. For offshore, whitewater or remote trips, seek professional assessment rather than treating a successful leak test as clearance.