
A Safer Hull-Cleaning Routine for Every Type of Buildup
Identify the material and coating, work ashore when practical, start with mild soap and soft tools, then escalate only to a compatible treatment.
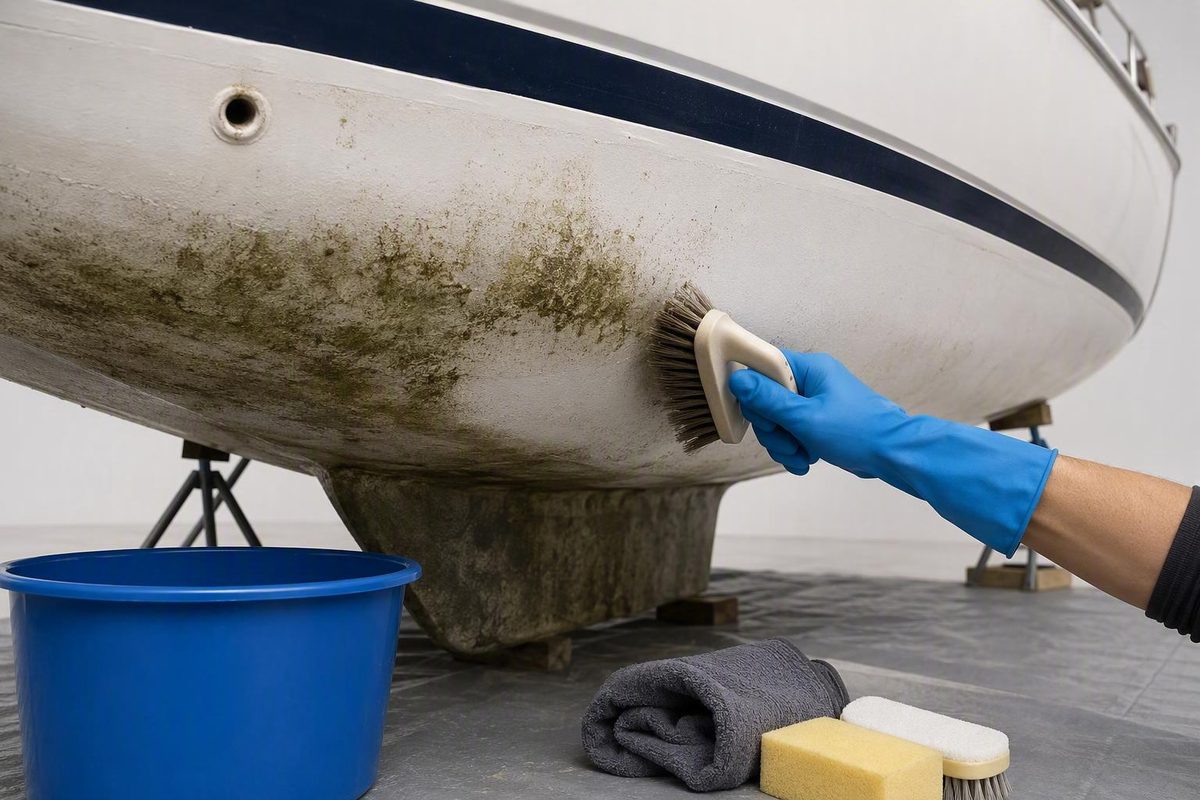
Learning how to clean the hull of a boat is less about finding the strongest cleaner than making the right decisions in the right order. First identify the hull material and coating. Then determine what kind of buildup remains and whether the work can be completed safely afloat or ashore.
For the surfaces covered here, the conservative starting point is fresh water, pH-neutral marine soap, and a soft washing tool. Remove what that combination can handle, reassess the residue, and escalate only to a treatment expressly approved for the surface. Waterline staining, barnacles, oxidation, and ordinary grime may all make a hull look dirty, but they are different problems.
This guide covers fiberglass or gelcoat, painted surfaces, bare or painted aluminum, and antifouling-coated bottoms. It does not provide detailed procedures for wood, inflatable fabrics, vinyl, or specialty composites. For those materials, follow the boat and material manufacturers’ instructions.
Identify the hull, coating, and buildup before you clean
Before opening a cleaner or choosing a brush, answer five questions:
- What is the hull made from? Common possibilities include fiberglass, gelcoat over fiberglass, aluminum, wood, inflatable fabric, and specialty composites.
- What covers the hull? Look for paint, gelcoat, decals, graphics, a clear protective coating, or antifouling paint.
- Where is the dirty area? Topsides, the waterline, and the underwater bottom may have different finishes.
- What is attached to the surface? Salt, ordinary grime, algae, mineral deposits, oxidation, and shell growth require different responses.
- Is the finish sound? Peeling paint, exposed substrate, cracks, blisters, or corrosion turn a cleaning job into an inspection or repair decision.
Check the owner’s manual, maintenance records, paint cans, yard invoices, or coating documentation if the finish is not obvious. A previous owner, dealer, marina, or boatyard may also know what was applied.
The principal surface categories covered in this guide are:
- Fiberglass or gelcoat: Generally suited to mild marine soap and soft washing tools, but uncontrolled abrasives can dull or alter the finish.
- Painted hulls: Safe treatment depends on the paint system, gloss level, age, graphics, repairs, and current condition.
- Bare or painted aluminum: Requires aluminum-compatible cleaners and nonmetallic tools. A method intended only for fiberglass may discolor or damage aluminum.
- Antifouling-coated bottoms: The exact coating controls the procedure. Hard, ablative, copper-based, and other systems should not automatically receive the same brushing, scraping, or pressure washing.
Next, classify the buildup:
- Salt and ordinary grime usually respond to fresh water, mild soap, and gentle agitation.
- Soft algae or slime may require a second gentle pass but not necessarily stronger chemistry.
- Waterline scum and exhaust residue may need a compatible stain treatment after routine washing fails.
- Mineral or rust stains may call for a labeled acid-based cleaner on an approved surface.
- Barnacles and mussels are attached growth that can require careful mechanical removal.
- Calcified shell rings can remain after shells are lifted and may need a separate compatible treatment.
- Oxidation is degraded surface material rather than deposited dirt. It can appear as dull or chalky gelcoat or as dull, chalky areas on bare aluminum.
If you cannot identify the material or coating, stop before using acids, abrasives, polishing compounds, pressure washing, or wax. Ask the boat, paint, or coating manufacturer—or a yard familiar with that finish—for instructions. The same caution applies when decals cross the work area or previous repairs have created several adjacent surfaces.
The governing principle is straightforward: use the least aggressive effective method. Begin with fresh water, pH-neutral marine soap, and a soft brush, sponge, or wash mitt. Escalate only after identifying what remains and confirming that the proposed treatment is compatible.
Choose a safe work location and assemble the basic kit
For full-hull access, hard marine growth, stain treatment, or work on the bottom, clean ashore at a marina wash station or another location approved for boat washing. Working ashore improves access and inspection and makes it easier to keep cleaning products and removed debris out of the surrounding water. A dry-land marina cleaning area is also recommended in BoatLIFE’s basic hull-cleaning sequence.
Establish secure access before beginning. A trailered boat should be parked securely on suitable level ground. If the boat needs lifting, blocking, repositioning, or access beneath the hull, use a professional haul-out and support arrangement. This guide does not provide trailer-jacking or blocking instructions.
Work in shade when possible. Direct sun and a hot surface can make cleaners dry prematurely, leading to streaks and tempting the user to apply more product. If shade is unavailable, reduce the size of each working section and rinse sooner.
Basic cleaning kit
Gather the following before wetting the hull:
- Hose with an adjustable spray nozzle
- Two clean buckets
- pH-neutral marine soap compatible with the surface
- Soft nylon brush, sponge, or wash mitt
- Microfiber drying towels
- Smooth-edged plastic scraper for compatible surfaces
- Waterproof gloves
- Eye protection
- Any additional protective clothing or respiratory equipment required by the product label
- Runoff-control materials accepted by the wash facility
- Instructions for the boat, paint, antifouling coating, and cleaners
Use one bucket for the wash solution and a second for rinsing grit from the brush or mitt. This reduces the amount of abrasive debris transferred back to the hull. Replace the rinse water when it becomes visibly dirty.
Waterproof gloves and eye protection are sensible baseline precautions, but they do not replace the cleaner’s label. Required ventilation, protective clothing, and respiratory protection depend on the product, application method, and exposure. A particulate dust mask does not protect against chemical vapors. Do not mix products containing bleach and ammonia. Electrical equipment used in wet or damp conditions should have suitable ground-fault circuit-interrupter protection, and equipment capable of producing sparks must be kept away from fuel and fumes. These precautions are summarized in Merrimac’s boat-cleaning safety guidance.
Decide how runoff and removed material will be handled before work begins. Ask the marina, wash-station operator, or relevant local authority what the site accepts and how wash water, fouling, paint residue, oil, and cleaner must be managed. If the applicable requirements or containment arrangements are unclear, postpone the job rather than improvising disposal.
The universal step-by-step hull-washing process
The following is a conservative baseline for the covered surfaces, not a promise that every cleaner or tool is universally compatible. Manufacturer, coating, site, and product instructions still control the details.
Step 1: Stabilize or haul the boat safely. Secure the boat and establish suitable access. Use a professional haul-out or support arrangement when the bottom cannot be reached safely from a properly positioned trailer or work platform. Do not attempt to clean beneath a hull whose support arrangement is uncertain.
Step 2: Remove loose debris and inspect attached growth. Pick off leaves, weeds, fishing line, and other loose material without dragging it across the finish. Examine attached growth before choosing a scraper. Soft algae, isolated barnacles, and extensive shell colonies should not automatically receive the same tool.
Step 3: Pre-rinse with fresh water. Rinse away salt, sand, grit, and loose dirt. Start high and allow water to carry debris downward. Removing grit first reduces the chance of rubbing particles across the finish during washing.
Step 4: Wash with a compatible mild cleaner. Prepare pH-neutral marine soap according to its label. Apply it with a soft brush, sponge, or wash mitt unless the surface manufacturer specifies another method. Do not substitute an abrasive household cleaner because the first pass is slow.
Step 5: Work in manageable sections. Use light pressure and overlapping passes. Keep each section small enough to rinse before the product dries. Rinse the tool frequently in the second bucket so grit is not carried around the hull.
Step 6: Reassess what remains. After the mild wash, stop and inspect the surface. Do not scrub the entire hull more aggressively because a few marks remain. Determine whether the residue is algae, mineral staining, shell material, exhaust deposit, oxidation, damaged paint, or something unknown.
Step 7: Spot-treat the identified problem. Choose a product explicitly approved for both the hull material and its coating. Test an inconspicuous area first. Follow the product’s stated dilution, application method, dwell time, ventilation, protective-equipment, and rinsing instructions. Do not allow it to dry unless the label specifically directs that result.
Step 8: Rinse thoroughly from top to bottom. Rinse seams, chines, fittings, steps, strakes, brackets, and other areas where residue can collect. Continue until no foam, cleaner, or treatment film remains.
Step 9: Dry the hull completely. Use clean microfiber towels.
Step 10: Inspect before restoring or protecting. Decide whether the finish needs no further work, a compatible protectant, controlled oxidation restoration, coating repair, or professional evaluation. Cleaning and coating repair are separate jobs.
This rinse-wash-rinse-dry sequence is consistent with the general process described in Boater’s World’s boat-cleaning guide.
Printable hull-cleaning checklist
- [ ] Secure or haul the boat appropriately
- [ ] Identify the surface, coating, and buildup
- [ ] Remove loose debris
- [ ] Pre-rinse with fresh water
- [ ] Wash gently with compatible soap and soft tools
- [ ] Reassess and spot-treat only what remains
- [ ] Rinse completely from top to bottom
- [ ] Dry with clean microfiber towels
- [ ] Inspect the exposed finish
- [ ] Protect only if the finish permits it
Match the cleaner and tool to the hull surface
Compatibility matters more than cleaning power. The table below is a conservative screening guide, not a compatibility determination. Exact manufacturer instructions should control acids, scraping, pressure washing, polishing, compounding, and protective treatments.
| Surface | Routine cleaner | Preferred tool | Methods requiring approval | Methods to avoid |
|---|---|---|---|---|
| Fiberglass or gelcoat | pH-neutral marine soap | Soft brush, sponge, or wash mitt | Acid stain removers, pressure washing, compounding, polish, wax, sealant, ceramic coating | Metal scrapers, wire brushes, uncontrolled abrasives, unidentified harsh chemicals |
| Painted hull | Non-abrasive pH-neutral soap | Soft sponge, mitt, or brush | Acids, pressure washing, polishing, compounding, wax, treatments over decals or graphics | Unapproved abrasives, stiff scraping, concentrated spray on damaged paint |
| Bare aluminum | Aluminum-safe pH-neutral soap | Soft nylon brush, sponge, or mitt | Stain removers, polish, pressure washing, acid treatments | Steel wool, wire brushes, metal scrapers, bleach or chlorine, harsh acids, fiberglass-only cleaners |
| Painted aluminum | Cleaner approved for both aluminum and the paint | Soft nylon tool or sponge | Polish, wax, pressure washing, stain treatments | Anything prohibited for either the aluminum or paint system |
| Antifouling-coated bottom | Product approved by the coating manufacturer | Softest approved brush or tool | Scraping, pads, pressure washing, chemical treatments | Aggressive scrubbing, metal scraping, unapproved acids, wax |
| Wood, inflatable fabric, vinyl, specialty composite | Manufacturer-specific only | Manufacturer-specific only | Any method not expressly approved | Generalizing fiberglass or aluminum methods to these materials |
Fiberglass and gelcoat
For routine grime, begin with pH-neutral marine soap and a soft brush, sponge, or wash mitt. If staining remains, identify it before choosing a labeled gelcoat-compatible treatment. Do not use compounding as a stronger substitute for soap.
Compounding is an abrasive restoration process used for oxidation or another defined correction need. Test any abrasive procedure in an inconspicuous area and use the least aggressive grade approved for the finish.
Painted hulls
Use non-abrasive soap and soft tools. Take particular care around boot stripes, graphics, decals, repaired areas, and edges where paint has begun to lift. Obtain finish-specific approval before applying an acid cleaner, abrasive, pressure washer, compound, polish, wax, sealant, or ceramic coating.
“Painted” is not a complete surface description. Gloss polyurethane, matte paint, one-part paint, and antifouling paint should not be assumed to tolerate the same process.
Aluminum
For its welded aluminum boats, Alweld recommends aluminum-safe soap, nonmetallic tools, thorough rinsing, and microfiber drying. It warns against steel wool, wire brushes, metal scrapers, bleach or chlorine, harsh acids, and cleaners intended only for fiberglass. Painted areas, decals, and protective coatings may require separate dealer or finish-specific instructions.
Where general sources differ about soft versus medium bristles, begin with a soft nylon tool. Increase stiffness only if the manufacturer of the hull and finish permits it. Heavy chalking, pitting, corrosion, or failing paint calls for assessment rather than stronger household acids or more aggressive pads.
Antifouling coatings
The coating manufacturer’s instructions control. Soft or ablative antifouling can be removed during cleaning, and even a plastic scraper can lift paint. Aggressive cleaning of copper-based coatings can release coating material into the water while reducing the material remaining on the hull.
One sailor described using plastic scrapers and a scouring pad with light pressure on a hard Coppercoat system. That first-person method does not establish that scouring pads are safe for soft, ablative, conventionally painted, damaged, or unidentified antifouling. The same account reports that scrubbing releases copper and may shorten the coating’s useful life (Practical Boat Owner’s account).
Do not transfer methods used on underwater hardware to the hull. Wire brushes, files, and other aggressive tools sometimes used on anodes, propellers, saildrives, or passages may damage hull coatings.
Troubleshoot algae, waterline stains, barnacles, and oxidation
After the mild wash, treat what remains according to what it is—not merely according to how stubborn it feels.
| Remaining problem | First response | Possible escalation | Stop or seek help when |
|---|---|---|---|
| Routine grime or salt | Fresh water and pH-neutral soap | Repeat gentle washing on isolated areas | The apparent dirt is coating failure |
| Soft algae or slime | Soft brush or sponge with compatible soap | Coating-approved algae treatment | Antifouling transfers heavily to the tool |
| Waterline scum | Mild wash and gentle agitation | Labeled stain remover approved for the finish | Surface or stain type is unknown |
| Mineral or rust stain | Mild wash | Approved acid-based treatment on compatible fiberglass or gelcoat | Paint, aluminum, damaged gelcoat, or uncertain runoff control is involved |
| Exhaust residue | Mild wash promptly | Finish-approved exhaust or hull-stain cleaner | Deposit persists on damaged or chalking paint |
| Barnacles or mussels | Haul out and assess attachment | Smooth plastic scraper on an approved surface | Growth is extensive or the coating lifts |
| Calcified shell rings | Wash after shell removal | Compatible labeled deposit remover | Treatment begins altering the finish |
| Gelcoat oxidation | Wash and assess chalking | Controlled compound, followed by polish | Oxidation is deep or prior restoration history is unknown |
| Aluminum oxidation | Aluminum-safe wash and assessment | Manufacturer-approved polish for mild cases | Chalking is heavy, corrosion is present, or paint is failing |
Routine grime, salt, and light algae
Start with fresh water, pH-neutral soap, and gentle agitation. A second pass over an isolated area is reasonable, but extra pressure is not always more effective. Stop if the tool begins picking up paint or substantial colored antifouling residue.
Treat new deposits before extended storage or long periods of neglect.
Waterline, mineral, rust, and calcified stains
On compatible fiberglass or gelcoat, a labeled acid-based hull cleaner may be appropriate after mild soap fails. “Acid-based” describes a product category, not a universal formula. The product label and finish manufacturer must determine whether the cleaner is suitable.
Before using an acid or oxalic-acid product:
- Confirm approval for the exact hull and coating.
- Test an inconspicuous area.
- Wear the label-specified protective equipment.
- Provide the required ventilation.
- Follow the stated dilution and dwell time.
- Work in small sections.
- Do not let the treatment dry unless directed.
- Rinse promptly and thoroughly.
- Use the wash area’s required runoff-handling procedure.
Do not invent a neutralization method or combine the cleaner with another chemical. A first-person cleaning account likewise emphasizes matching cleaners to the surface, working section by section, wearing gloves, and rinsing chemical treatments promptly (Cruising World’s hull-cleaning guide).
Barnacles, mussels, and shell rings
Avoid stabbing, chiseling, or digging the scraper’s corners into the surface. Stop if paint, gelcoat, or antifouling begins lifting.
Plastic is generally preferable to metal for this task, but it is not harmless. Commercial hull-cleaning guidance also recommends plastic rather than metal tools for barnacles because metal scrapers can gouge the hull (Boat Juice’s hull-cleaning guide).
Once the shell is removed, do not attack a calcified ring with a harder scraper. Use a compatible labeled deposit treatment or ask a boatyard to complete the removal.
Oxidation
Washing removes contamination; it does not reverse degraded surface material. Restoration of oxidized gelcoat may involve three separate operations:
- Compounding abrasively removes part of the degraded surface layer.
- Polishing refines the corrected surface and restores gloss.
- Protecting adds a compatible wax, sealant, or other finish-dependent layer.
Do not compound an entire hull because soap failed to remove one localized stain. Stain removal and abrasive restoration solve different problems.
Heavy aluminum oxidation, extensive gelcoat chalking, failing paint, deep corrosion, or widespread hard growth warrants guidance from the boat or coating manufacturer, a dealer, a qualified detailer, or a boatyard. Stop DIY work if you find cracks, blisters, exposed substrate, peeling coating, unknown stains, extensive barnacles, or runoff you cannot manage through the approved wash area.
Pressure washing, in-water cleaning, and when to haul out
Pressure washing is optional, not a default step. Use it only when both the hull and coating manufacturers permit it.
If approval is clear:
- Begin with the gentlest effective setting.
- Use a wide fan pattern rather than a concentrated jet.
- Maintain the distance specified for the surface.
- Keep the nozzle moving.
- Approach coating edges and repairs cautiously.
- Avoid concentrated spray on decals, graphics, seals, seams, fittings, transducers, damaged paint, and sensitive antifouling.
Do not copy a pressure number or working distance from an unrelated boat. Alweld advises low pressure, a wide fan, and a minimum distance of six inches for its welded aluminum boats, but that manufacturer-specific distance is not established as safe for fiberglass, paint, soft antifouling, wood, inflatable fabric, or other surfaces (Alweld’s welded-aluminum guidance).
Washing topsides is not the same as cleaning underwater
Underwater-bottom cleaning introduces immersion, current, entanglement, poor visibility, vessel movement, electrical exposure, environmental concerns, and the possibility of removing coating material. A wave or changing current can move the hull against the person working beside or beneath it. Do not enter the water to clean a hull alone; having another person present does not, by itself, make the work safe or replace appropriate competence and site controls (Merrimac’s safety guidance).
Before arranging any in-water cleaning, ask the marina whether it is permitted and what local requirements apply to biological debris and antifouling residue. A professional hull diver should be told the exact coating and should use tools appropriate to it. Cleaning a bottom until it looks visually pristine may remove functional antifouling.
A boat-owner forum includes a strong warning against entering freshwater at a marina with electrical service. That anonymous report is not an electrical-safety standard and should not be treated as one; it is a reason to avoid casual DIY immersion and obtain marina-specific safety guidance instead (Sailboat Owners forum discussion).
DIY, diver, or haul-out?
Use this decision framework:
- DIY ashore: May be reasonable for light grime on a safely accessible trailered hull when the material and coating are known and the wash site can handle the runoff.
- Coating-aware professional diver: May be appropriate for limited in-water fouling when the marina permits the work and the professional understands the exact antifouling system.
- Haul-out: Preferable for heavy growth, long neglect, uncertain coatings, damaged paint, chemical treatment, poor underwater visibility, or a complete inspection.
A haul-out also exposes through-hulls, intakes, anodes, propellers, rudders, keels, transducers, and other below-waterline components for inspection. These parts may require separate cleaning and maintenance methods; do not assume the hull’s brush, scraper, or cleaner is suitable for every fitting.
Dry, inspect, and protect the finish correctly
Do not judge or protect a wet hull. Rinse completely and dry with clean microfiber towels. Drying reduces spots and streaks while making remaining film, chalking, corrosion, cracks, and coating defects easier to see.
Inspect the clean surface systematically for:
- Cracks or hairline fractures
- Blisters or raised areas
- Corrosion, pitting, or chalking
- Exposed substrate
- Peeling, flaking, or thin paint
- Deep oxidation
- Damaged decals or graphics
- Deteriorated sealant
- Damage around fittings, transducers, seams, and penetrations
- Residual shell rings or unidentified stains
Cleaning, stain removal, compounding, polishing, and protection are separate operations:
- Cleaning removes dirt, salt, slime, and compatible loose contamination.
- Stain removal targets discoloration or deposits with surface-approved chemistry.
- Compounding abrasively removes degraded surface material.
- Polishing refines the finish and restores gloss after cleaning or controlled correction.
- Waxing applies a finish-dependent sacrificial coating.
- Sealants are another category of protective finish.
- Ceramic coatings are distinct systems with their own preparation and compatibility requirements.
These processes are not interchangeable, and protection cannot repair a failing coating. Compounding is especially easy to misuse because an abraded test area may look cleaner even when removing material was unnecessary.
For compatible gloss gelcoat or gloss-painted surfaces, wax or sealant may be applied according to its label once the surface is clean and completely dry. Confirm that the finish permits the treatment, particularly around repaired paint, graphics, nonskid transitions, and recently applied coatings.
For its welded aluminum boats, Alweld considers wax suitable for gloss or metallic paint, optional on bare aluminum, and inappropriate for flat or matte paint. Do not generalize that recommendation to an unidentified finish.
Do not apply a protectant over cracks, blisters, corrosion, peeling paint, or heavy oxidation merely to conceal them. Those conditions require diagnosis, coating guidance, or repair.
Build a maintenance schedule around use and water conditions
There is no defensible universal cleaning interval. Fouling varies with saltwater exposure, water temperature, nutrients, local organisms, coating type, storage arrangement, and how often the boat moves.
Build the schedule around observation rather than an arbitrary monthly rule.
After use
Rinse with fresh water, especially after saltwater exposure. Check the waterline, bow, chines, transom, and areas near exhaust outlets. Address new dirt and staining before an extended period of storage or neglect.
The rinse does not need to become a deep cleaning every time. Its purpose is to remove loose salt and contamination before they require a more involved wash.
For trailered boats
After use:
- Rinse the accessible hull with fresh water.
- Inspect the waterline and trailer-exposed areas.
- Wash gently when buildup becomes visible.
- Address fresh staining promptly.
- Clean and dry the hull completely before extended storage.
Storage preparation is also an opportunity to document paint defects, corrosion, or areas that need professional attention before relaunching.
For boats kept afloat
Conduct regular visual checks from the dock, a tender, or another safe position. Base the cleaning plan on local fouling pressure, marina requirements, and the antifouling manufacturer’s instructions.
Do not turn one owner’s experience into a universal schedule. In a high-fouling area, one Coppercoat-equipped catamaran owner reported cleaning every four to eight weeks, with the interval changing according to local water conditions (Practical Boat Owner). That example illustrates variability; it does not establish a schedule for another boat or coating.
Alweld, meanwhile, suggests light washing every two to four weeks under heavy use and a fuller cleaning every two to three months during typical in-season use for its welded aluminum boats (Alweld’s maintenance guidance). Those manufacturer examples are not general requirements for fiberglass, painted, or antifouling-coated hulls.
If cleaning becomes progressively more frequent or aggressive, assess the coating rather than automatically scrubbing harder. Arrange professional help when growth is extensive, the coating is unknown or failing, access is unsafe, defects appear, or the wash site cannot manage the resulting contaminated material.
A clean hull should not come at the expense of its finish, the cleaner’s safety, or the surrounding water. Identify the material and coating, work ashore when practical, start with mild soap and soft tools, and escalate only to a compatible treatment. Rinse and dry completely, inspect before applying protection, and stop when the coating, damage, access, or runoff cannot be managed appropriately.
Can I use a pressure washer to clean a boat hull?
Only when the hull and coating manufacturers permit it. Begin conservatively, use a wide fan pattern, maintain the distance specified for the surface, and keep the nozzle moving. Avoid concentrated spray on decals, graphics, seals, seams, fittings, transducers, damaged paint, and sensitive antifouling.
There is no universal safe pressure or stand-off distance. If the finish is unknown, deteriorated, or ablative, use a gentler approved method or consult a boatyard.
What is the safest way to remove barnacles without damaging the hull?
Obtain safe dry-land access and confirm that the coating permits mechanical removal. Use a smooth-edged plastic scraper at a shallow working angle, applying controlled pressure beneath the shell rather than stabbing or gouging the surface.
Stop if paint or coating begins to lift. Treat remaining calcified rings with a compatible labeled product instead of escalating to a metal scraper. Extensive growth, soft antifouling, or an uncertain finish is better handled by a coating-aware yard or detailer.
Can I clean a boat hull while it is still in the water?
In-water cleaning is not equivalent to washing an accessible trailered hull. It adds immersion, visibility, vessel-movement, electrical, environmental, and coating-compatibility questions that a routine wash does not address.
Ask the marina whether the work is permitted and what local requirements apply. For uncertain coatings, limited visibility, electrical concerns, or anything beyond light fouling, use a qualified coating-aware professional or haul the boat. A buddy alone does not make underwater DIY cleaning safe.
Should I wax the hull after cleaning it?
Only when the finish manufacturer permits it. Wax or sealant may be appropriate for compatible gloss gelcoat or gloss paint after the hull is clean and completely dry. It may be optional on some bare aluminum and inappropriate for matte or flat paint.
Do not wax antifouling paint or use a protectant to hide cracks, blisters, corrosion, peeling paint, or heavy oxidation. Compounds, polishes, waxes, sealants, and ceramic coatings perform different jobs.
How often should a boat hull be cleaned?
Base the schedule on water conditions, fouling pressure, coating type, storage, and use rather than a universal calendar. Rinse after use—particularly after saltwater exposure—inspect regularly, and address visible contamination before long-term storage or neglect.
Trailered boats can be washed gently as buildup appears and should be clean and fully dry before storage. Boats kept afloat need a locally appropriate plan based on visual checks, marina requirements, and antifouling instructions. Extensive growth, shortening intervals, or coating loss calls for inspection rather than automatically more aggressive cleaning.